Showing posts with label baked. Show all posts

Friday, February 19, 2016

CRISPY BAKED ONIONS RINGS


Who doesnt like Fried foods?They are so tasty and comforting any given day but a lot of guilt comes with it. For a person like me who loves fried food but doesnt like to fry its  such a daunting task to stand in front of the hot oil and fry especially in this summer heat. But I had to do something to satisfy my cravings for it. This crispy baked onion rings is just the solution. Its totally GUILT FREE and completely satisfying. Its one of the best onion rings I ever had.
The secret is to coat the bread crumbs with a little bit of oil before coating it onto the rings. This helps it to brown evenly. This was one of the tips given by the chef on foodnetwork. Dont remember his name.


INGREDIENTS

Vidalia onions - 2 nos
Buttermilk - 1 cup
Hot Sauce - 1 tbsp ( I used buffalo wing sauce)
All Purpose flour -  1 cup
Garlic pdr - a few sprinkles
Cayenne pepper - 2 tsp
Black pepper pdr - 1 tsp
Panko Bread crumbs(seasoned)
oil - 1 tsp
Ice cold water

Note:- The measurements here doesnt have to be perfect you can increase and decrease the amount according to your taste.You can also add any other spices and herbs you like.onion pdr, cumin pdr, thyme etc


METHOD

Slice the onions to 1/2" thick rings. Separate them and put them in ice cold water to firm it up.
In a plate mix flour,garlic pdr,cayenne pepper, pepper. Salt is not reqd if you are using seasoned breadcrumbs otherwise add some for taste. In a bowl pour buttermilk and hot sauce.If you like spicy add more hot sauce. In another plater add bread crumbs and a tsp or so just enough to wet the crumbs. This helps the crumbs to brown nicely without drying out. I like to use panko breadcrumbs cause it gives a great crunch.


Preheat oven to 375 deg F. Remove the rings from the cold water one at a time.You dont have to pat it dry, the water will help the flour to stick to the onions. Coat the rings  in the order of flour, buttermilk and bread crumbs. Transfer it to the cooling rack. Baking it on the cooling rack will let the heat to flow nicely and help the rings to brown evenly. Bake for about 20- 25 mins or until brown. Serve warm with coffee or tea!!!

ENJOY!!!

Thursday, June 7, 2012

PEACH COBBLER


After long, dull winter months we always look forward to an active summer,  great outdoor activities, gardening, and vacations etc. Apart from that I also look forward to the variety of fruits summer has to offer. Peach is one of them. A sweet juicy bite of one of them is good enough to brighten up your mood . For a change I decided to bake it. Peach cobbler was the perfect choice. Its easy and simple to make and tastes absolutely delicious. Cobbler refers to a variety of dishes, consisting of a fruit or savoury filling poured into a large baking dish and covered with a batter, biscuit, or pie crust before being baked. Unlike a pie, cobbler never contains a bottom crust.(source - wikipedia)

I have come across many cobbler recipes, most of it are same and requires a lot of butter so I modified it to my taste by reducing the butter quantity and adding oats for more fiber.


INGREDIENTS

Peach - 7-8 nos, peeled and diced
Sugar - 1 1/2 tbsp
Flour - 1 tbsp
Cinnamon pdr - 1 tsp

For the crust:-

Flour - 1 cup
Oats - 4 tbsp (I used quaker quick cooking oats)
Baking pdr - 1 tsp
Baking soda - 1/2 tsp
Sugar - 1/4 cup
Cold butter - 3 tbsp
Cold milk - 5-6 tbsp


METHOD

Preheat oven to 425 deg F. In a large mixing bowl, mix in the diced peach,sugar,flour and cinnamon pdr until the fruit is all evenly coated. Keep it aside.

In another bowl mix all the dry ingredients required for making the crust. Add the cold butter and slowly crush it into the flour. Make sure not to melt it. Now slowly add the milk 1 tbsp at a time and mix it well until it forms a soft dough.


Grease a baking dish with some cooking spray. Put the fruit mix at the bottom. Place small pieces of the dough on top of the fruit until fully covered. Place it i the oven. Bake for 20-22 mins or until crust is golden brown. Serve warm with some whipped cream or ice cream.

ENJOY!!!

Tuesday, November 1, 2011

CHEWY PEANUT BUTTER COOKIES


I love to snack on peanut butter sandwich (without the jelly) anytime, especially if its chunky peanut butter. Its very filling and so nutritious that i sometimes replace my meal with a peanut butter and banana sandwich.It's really delicious.So absolutely no surprise that i made these cookies.These cookies are chewy with a perfect crunch to it.All you need is a glass of milk to dunk it in :).


INGREDIENTS

Chunky peanut  butter -- 1 cup( can also use smooth one too, add nuts in the end for the crunchiness)
Sugar - 1/3 cup
Brown sugar - 1/3 cup, tightly packed
Egg  - 1
Milk - 2 tbsp
Vanilla extract - 2 tsp
All purpose flour - 2 tbsp
Baking powder - 1 tsp
baking soda - 1/4 tsp


METHOD

Preheat oven to 350 deg F.Mix together flour,baking powder and soda in a bowl.Keep aside.In another bowl,using a beater ,cream together peanut butter,sugar and brown sugar until well combined. Add the egg and beat again.Now add the milk and vanilla extract. Beat it until its all mixed together.Do not over beat.Stir in the flour mixture.Line a cookie sheet with aluminium foil.Grease your palm with some oil.Make lemon size balls of the dough and put it on the sheet.Press it  a little.Leave enough space between each balls for the cookies to spreaad. Bake for 10-12 mins until golden brown. Let it cool for 10-15 mins before eating.


ENJOY!!!

Monday, May 2, 2011

NO FRY CORN - CAULIFLOWER MANCHURIAN


Chinese Fooooood - Yummmmmmmmm,Cauliflower manchurian - YUM YUM YUMMMMM.How much ever i love having this dish i do feel guilty eating it thinking of the amount of oil that goes in making it.But that shouldnt deprive one from enjoying it. So here is a healthy way of preparing this dish and then eating it feeling guiltless about it :). This version is as good as the restaurant versions i have eaten with a big Bonus - No Frying Required and can be made in a Jiffy.Now lets go straight to the recipe.


 INGREDIENTS

Cauliflower florets - 4 cups
Corn kernels - 1 cup
Green pepper - 1 medium size, diced small
Green onion - 3-4 nos, chopped small
Ginger-garlic - 1 tbsp, chopped fine
Chilli flakes - 1 tsp
Soya Sauce - 1/4 cup
Ketchup - 1/4 cup(use more or less according to your taste)
Chilli-garlic sauce - 2 tsp
Salt to taste
Oil - 1 tbsp


METHOD

Preheat oven to 425 deg F.Coat each of the florets with some oil and season with salt and pepper.Bake for 25- 30 mins or until it turns brown.Keep aside.To make the sauce,heat some oil in a pan.Add ginger-garlic, cook for a minute.Then add green onions, stir for a minute as well. Spice it up a little with some chilli flakes.Now add the diced green peppers and corn kernels.Seaon with salt.Cook until its soft.Now add the soya sauce,ketchup and chilli garlic sauce.Cook it for a couple of minutes and then add the baked cauliflower florets.Mix it in the sauce well. Let it simmer for 5 mins.Serve warm with fried rice or rotis.

ENJOY!!!

Thursday, March 17, 2011

Carrot Cake

Hi everyone, hope all is well on your side.I have been away from blogging for a very long time, busy enjoying my new role as mom. Its so difficult to come back ones you are away from it for a long long time.Well now that i am back i intend to blog atleast ones a week. A comeback has to  always begin with something sweet. 

Carrot cake is something both B and me love.When we want it ,we usually buy it from our nearby grocery stores.It comes with this extra sweet thick layer of cream cheese or sugar frosting on top which we are not a great fan of and most of it goes to waste. So decided to bake one at home where we can have all the carrot cake without worrying the frosting going to waste or not. Here was a neat recipe i came across in a cooking book i borrowed from the library- The Complete Cooking Light Cookbook ,compiled and edited by Cathy A Wesler. The carrot cake was soooooooooooooo moist and delicious.The sweetness was just perfect. We didnt miss the frosting at all. You have got to try this one.Here is the recipe.


SOURCE:- The complete cooking light cookbook compiled and edited by Cathy A Wesler
Ingredients

All Purpose flour - 2 1/4 cups
Baking pdr - 2 tsp
Baking soda - 1/4 tsp
Cinnamon pdr - 1 1/2 tsp
Nutmeg pdr - 1/4 tsp
Salt - 1/2 tsp
Whole egg - 1
Egg whites - 2
Sugar - 2/3 cup
Dark brown sugar - 2/3 cup
Applesauce - 1/2 cup
Vegetable oil - 1/4 cup
Fat free yogurt - 1/4 cup
Vanilla extract - 2 1/2 tsp, (I used 1 tsp of orange extract )
Shredded carrot - 2 cups


Method
Preheat oven to 375deg F. Sift all the dry ingredients in a large bowl. In a separate bowl whisk in sugar, egg and egg whites together then mix in rest of the wet ingredients except shredded carrot. Add the wet mixture into the dry mixture ,stirring until just moist.Now stir in the carrots.


Line the muffin pan with paper cups.Using ice cream scoop fill the cups with the batter.Bake for 20-25 mins or until a tooth pick inserted in the center comes clean.Let it cool for 10 mins before eating.


ENJOY


Monday, January 18, 2010

BROWNIES

"Belated happy new year to all of u".

Let me start this post by sharing a good news with u all. We have a new addition in our family now :).YES!!Hubby and me have been blessed with a healthy baby boy on Oct 19th ,2009.We named him Siddharth.He is 3 months old now .Its a joy having him around.Just cant wait for him to show us his new tricks as he grows.

I wanted to make some brownies for a long time now.Everytime for some reason or the other i kept postponing it.I had to share this good news with something sweet.I found no reason to postpone this any further.Just a week back i came across this very interesting brownie recipe.Unlike other brownie recipes this particular one required an unual ingredient - Avocado.Surprised!!!Well i was too and made up my mind to try it out.The result was astounding.Not a trace of avocado but a gooey rich chocolatey nutty taste.Too good to be true.Every chocolate lover has got to try this recipe out.I made some modifications to the original recipe.


INGREDIENTS

All purpose flour - 1/2 cup
Cocoa powder - 1/2 cup
Instant Espresso powder - 1 tsp
Salt - 1/2 tsp
Almonds - 1/2 cup
Cashew nuts - 1/2 cup
Dark chocolate - 3.5 oz
Canola oil - 1/2 cup
Ripe Hass avocado - 1 large
Eggs - 6 nos
Granulated sugar - 1/4 cup
Dark brown sugar - 1 cup
Dried cranberries - 1/4 cup

METHOD

Preheat oven to 350 deg F.In a bowl sift together flour,cocoa,espresso pdr and salt.Light roast the nuts and chop them into small pieces.Mix it with the flour and cocoa.Chop chocolate also into small chunks and mix it with the flour and keep aside.In a blender mix together eggs, avocado, sugar, oil to a smooth paste.Now pour this mixture into the bowl with flour and cocoa and slowly mix it using a whisk.

Pour this mixture into a baking dish coated with butter.Pu the cranberries evenly on top. Bake for 30-35 mins.Let it cool completely before cutting.Serve at room temperature.

Wednesday, February 18, 2009

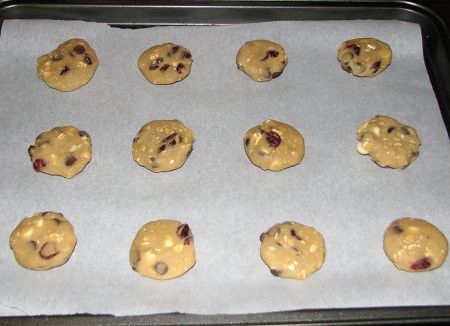
CRANBERRY CHOCOLATE COOKIES

It was a really nice long weekend for us.I made some delicious cranberry chocolate cookies for valentine's day.It may not be the appropriate sweet for the day but anything with chocolate in it sounds good to me.And if its combined with something like cranberries then there is no doubt.This heavenly combo is what attracted me to this in the first place.I saw these cookies on HC's My kitchen treasures blog and i knew it right away i have to make it.They were absolutely delicious.A little crunchy but i didnt mind that at all as long as i get a chocolate and cranberry in every bite.
The only small change i made is i added equal quantities of white and dark chocolate chips.Thank you HC for this wonderful recipe!!!

Tuesday, February 3, 2009

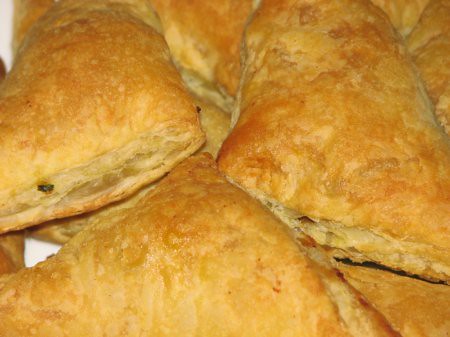
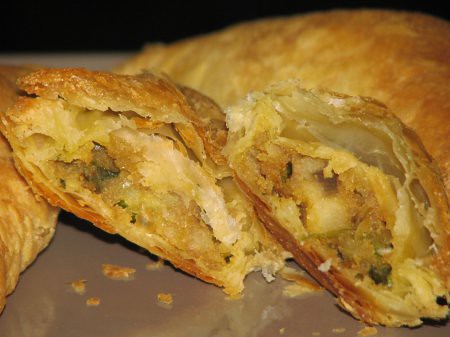
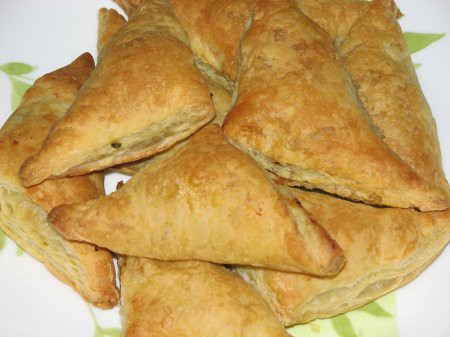
VEGETABLE PUFFS

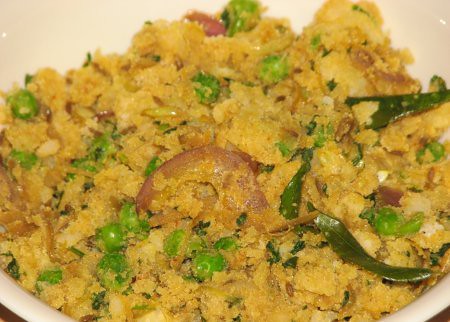
Vegetable puffs remind me of my good old school days.After school my friends and me used to hog on these crunchy puffs from the bakery before heading for our tuition classes.I loved it so much especially the egg puffs.Thats for later ,today its vegetable puffs.Its very easy to make this goodie as long as one has these store bought puff pastry sheets in their refrigerator.One can make any kind of filling,cheese and spinach or a sweet filling or a chicken filling.The one i have made is a simple potato and onion filling.I have taken this to so many get together parties and its always a hit.
INGREDIENTS

Puff pastry sheets - 1

For Filling:-

Boiled potatoes - 2 nos
Onion - 1 medium size, sliced
Frozen peas - 1/4 cup
Fresh ginger - 1 1/2 tsp, chopped
Fresh garlic - 2 cloves, chopped
curry leaves - of 1 sprig
turmeric - 1/4 tsp
red chilli pdr - 1 1/2 tsp
cumin seeds - 1 tsp
coriander pdr - 2 tsp
cumin pdr - 1 tsp
amchur pdr - 1/4 tsp
chaat masala pdr - 1 /4 tsp
coriander leaves - a small bunch, chopped
salt to taste


METHOD

Mash the potatoes and keep aside.Heat some oil in a pan.Add cumin seeds, ginger, garlic and curry leaves.Saute for a few seconds and then add the sliced onions.Saute it until they turn soft and translucent.Then add turmeric pdr,red chilli pdr,amchur pdr ,coriander pdr,cumin pdr and chaat masala pdr.Stir well and add the peas.Add salt and stir in for a couple more mins.Now add the mashed potatoes and mix well.In the end stir in the chopped coriander leaves.Keep aside and let it cool.

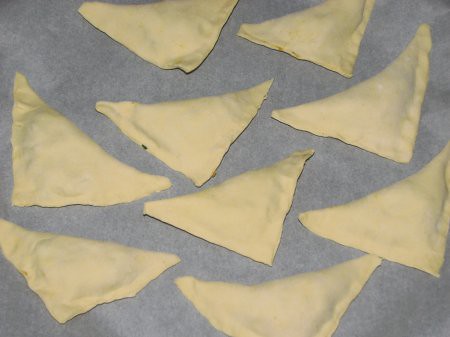
Follow the box instructions and thaw the puff pastry sheets.Preheat oven to 400 deg F.Sprinkle some flour on both sides of the pastry sheets and roll it out a bit.Cut it into 9 equal squares.take a spoonful of the filling and place it on the center of the square. Close it by lifting the opposite corner over the filling and pressing it tightly.Apply some water to help seal the edges.Bake for about 10-15 mins or until it turns golden brown.Serve it warm with coffee or tea.

Wednesday, December 31, 2008

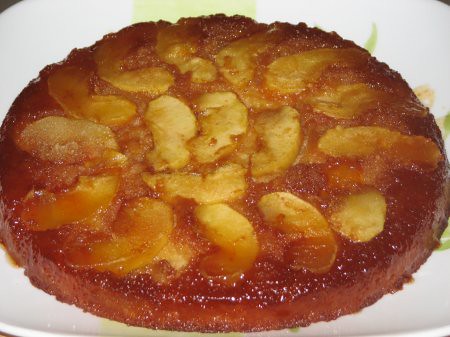
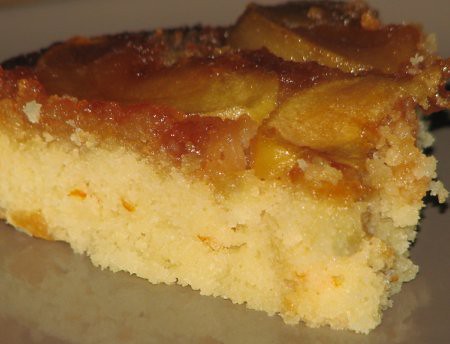
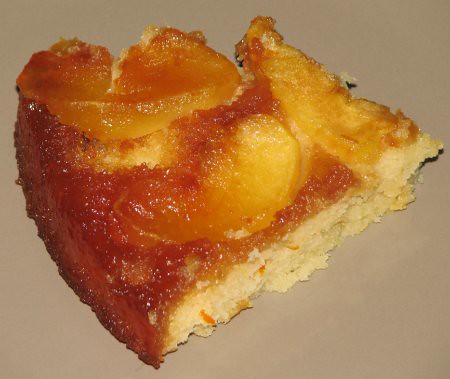
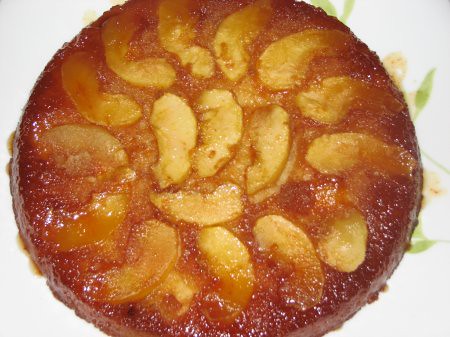
APPLE TATIN CAKE

A year comes to an end and begins with another , "I WISH ONE AND ALL A VERY HAPPY AND PROSPEROUS NEW YR".The begining of a year always calls for celebration for the good things that came your way in the previous yr and for some that is waiting to happen this yr.We celebrated with a delicious Apple tatin cake.I got this recipe from Ina garten of barefoot contessa.Her instructions are very easy to understand and i followerd her recipe without making any changes.This is a must try dessert,a great one for celebration!!!

I am sending this to JZ's Santas holiday challenge event.


INGREDIENTS

All purpose flour - 1 cup + 2 tbsp
Unsalted butter - 6 tbsp, room temperature + extra for greasing the dish

Apples - 11/4 piece, peeled and sliced
sugar - 1 + 3/4 cups , divided

Eggs - 2 , room temperature

Sour cream - 1/3 cup

Lemon zest - 1/2 tsp grated
Vanilla extract - 1/2 tsp
Baking pdr - 1/2 tsp

salt - 1/4 tsp

METHOD

Preheat the oven to 350 degrees F.
Generously grease a pie dish(9") and arrange the apples in the dish, cut side down.
Combine 1 cup of the granulated sugar and 1/3 cup water in a small saucepan and cook over high heat until it turns a warm amber color, about 360 degrees F on a candy thermometer. Swirl the pan but don't stir. Pour evenly over the apple slices.

Meanwhile, cream the butter and the remaining sugar in the bowl until light and fluffy.Beat in the eggs 1 at a time. Add the sour cream, zest, and vanilla and mix until combined. Sift together the flour, baking powder, and salt and add it to the butter mixture. Mix only until combined.
Pour the cake batter evenly over the apple slices and bake for 30 to 40 minutes, until a cake tester comes out clean. Cool for 15 minutes, then invert the cake onto a flat plate. If an apple slice sticks, ease it out and replace it in the design on top of the cake. Serve warm or at room temperature.

Saturday, November 29, 2008

CHICKEN PARMASAN

Chicken parmasan and eggplant parmasan are my 2 favorite Italian dishes.When my hubby and me go to any italian restaurant one of us is sure to order either of the 2 items.
Here the chicken is coated with italian seasonings,parmasan cheese and bread crumbs,quickly shallow fried to get a nice crust on the outside and then baked in oventopped with fresh mozarella and pasta sauce to melt the cheese and cook completely.Its usually served alongside any pasta or in between bread as sandwich.Vegetarians can use eggplant/brinjal for eggplant parmasan and follow the same technique.

This is my post on day 29 of RM2.

INGREDIENTS

Boneless chicken breasts - 1 large (good enough for 2)

Fresh mozarella - 3-4 slices(shredded mozarella works well too)

All purpose flour - 1 cup

garlic pdr - to taste

red chilli pdr - 1 tsp

butter milk - 1 cup

parmasan cheese - 1/2 cup

Bread crumbs - 1/2 cup(can also use seasoned bread crumbs,then you can avoid adding the italian seasonings)

Italian seasonings - 1 tsp

salt and pepper

olive oil

Pasta - 1 1/2 cup,any kind(i used rotelle)

pasta sauce - 3 cups,i used store bought(can use any kind)

water

salt

METHOD

Pound the chicken to 1/2" thickness using a mallet or use the bottom of a heavy skillet/pan and keep aside.Mix flour,garlic pdr salt and chilli pdr in a plate and keep aside.Pour buttermilk in another bowl and keep aside.On a 3rd plate mix cheese,bread crumbs and italian seasonings and keep aside.Add generous amount of garlic pdr and italian seasoning in order to get good flavor.Keep these 3 plates closely.First dip the chicken in the flour mixture,nicely coat both sides of the chicken and then dip it into the butter milk and finally into the cheese breadcrumbs mixture.Coat both sides very well.Do similarly with the other piece and keep aside.

In a wide pan pour enough oil to cover the surface.Ones its hot put the chicken pieces and fry it till its golden brown on both sides.Do not cook the chicken fully at this point.We will complete the cooking in the oven later on.Right now we are just aiming to get a nice crust on the outside.Ones done place them on a paper towel to drain off excess oil.

Preheat oven to 450 deg F.Take an oven proof pan,pour some sauce on the bottom.Now place the chicken on it and top it with mozarella cheese.Bake it for about 6-8 mins.Serve it hot on top of pasta.

Cook the pasta according to the box instructions and mix it with the pasta sauce.Serve it hot with chicken parmasan.

Do check what my fellow marathoners have cooked up today...just 1 more day to go!!!

1) DK 2) Srivalli 3) PJ 4) Curry Leaf 5) Medha 6) Priya 7) Bhawna 8) Raaji 9) Ruchii 10)Anu 11) Kamala 12) Roopa13) Divya Kudua 14) Rekha 15) Divya M 16) Lakshmi 17) Raaga 18)Lakshmi Venkatesh 19) Sripriya 20) Viji 21) Pavani 22) Kamalika 23) Karuna 24) Roochi

Saturday, November 15, 2008

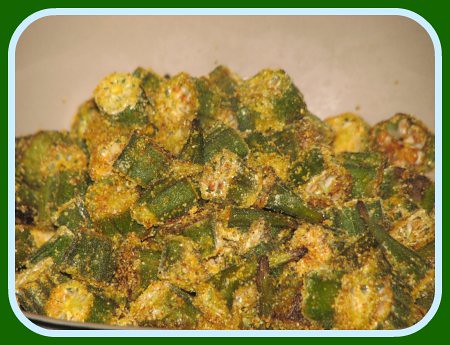
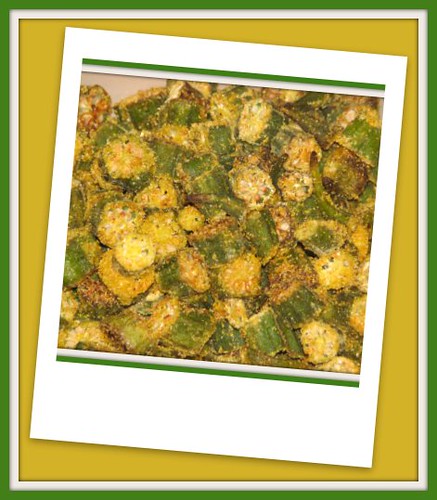
BAKED OKRA

Okra is one those few vegetables i like better crisp rather than cooked.Even though i love its taste when its cooked i hate it when it gets slimy and sticky.So i fry or bake it before adding it to a gravy.Here i have simply coated it with some cornmeal and some spices and then baked it at a high temperature.You can also fry it.Best when served hot right from the oven,it looses its crispiness when its cold.It's great with rice and dal.

This is my post on day 15 of RM2.


INGREDIENTS

Okra/bhindi/ladysfinger - 15 nos,cut into 1" pieces
kashmiri chilli pdr - 1 1/2 tsp


Yellow cornmeal - 1/2 cup


salt to taste


METHOD


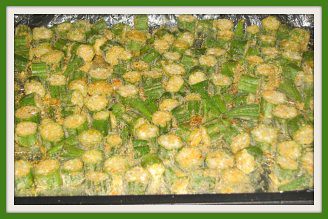
Preheat oven to 450 deg F.In a bowl mix the cornemal,chilli pdr and salt.Drop the chopped okra into the bowl and coat it evenly.Spread it on a baking sheet.Sprinkle some oil or non stick cooking sparay on top.Bake for 20-25 mins.Serve it hot with rice and dal.

See whats happening in these gals kitchen!!!

1) DK 2) Siri 3) Srivalli 4) PJ 5) Curry Leaf 6) Medha 7) Priya 8) Bhawna 9) Raaji 10) Ruchii 11)Anu 12) Kamala 13) Roopa14) Divya Kudua 15) Rekha 16) Divya M 17) Lakshmi 18) Raaga 19)Lakshmi Venkatesh 20) Sripriya 21) Viji 22) Pavani 23) Kamalika 24) Karuna 25) Roochi